
5 FUN PHOTOGRAPHY PROJECTS TO ENTERTAIN THE KIDS
Looking for new activities to entertain the kids?
Seeking something creative but not messy?
Need something inspiring, not the same old?
Look no further. Here’s my top 4 fun, creative photography projects to entertain kids of all kinds of ages.
For most activities, all you need is a camera / camera phone and some imagination :-) Anything else needed, is listed.
1. Make a stop motion movie (suitable for ages 4+)
What you’ll need:
A stop motion app. When my sone Eddie and I did this, we used Stop Motion Studio on the iPhone, which was super easy to use. Available on the App Store, and Google Play store. There are in app purchases available but they are totally not required.
Toys to tell a story with.
Nice to have, but not essential: tripod / selfie stick with tripod function and remote control (usually both part of the selfie stick). The one I have isn’t available any more, but if I were buying again, I’d go for this one.
What to do:
Plan a little story to tell with your children, using toys and every day objects.
Set up the scene / stage for your story and have the characters in their starting positions.
Set up the phone or camera on the tripod, or balance on something sturdy so the position remains fixed, and you can see the whole scene (but nothing extra) in the frame. You can change the aspect ratio of the frame in the app.
Use your stop motion app to take the first photo.
Move any characters or items that need to move, a touch; then take the second photo. Continue like this until your story is complete.
You can experiment with how much you move the items and how many items you move at once. The smaller the movements and the more items move at any one time, the more fluid the movie will look. You’ll see from our video that the motion & story line are far from perfect, but as long as the kids are having fun, it does not matter.
Great for developing: fine motor skills in moving the pieces small amounts, understanding of using a tripod and remote control, story-telling, patience, understanding the bigger picture (no pun intended) of putting the frames together to create a film.
2. Go on a letter hunt & create a photo collage (suitable from 3/4+ once they can identify letters)

What you’ll need:
You don’t need anything except your camera phone if you want to keep this to a digital project. If you’d like to do it as a printed project then also a large piece of paper, and access to the internet to order prints or a home printer. But it would be nice to have a simple framing option to put the prints in instead of the large sheet of paper to stick prints on.
Here are a few simple frame options from Amazon that can do the job:
5 aperture frame to spell a short word like “peace.”
Block frames that can stand alongside each other to spell a word.
Pegs, string and print mounts for hanging letters across a window or wall ( great if you want to say a massive thank you to our key-workers, for example).
What to do:
When out and about on your daily exercise and in the home, look for letters - either already printed on signs, or letters out of shapes that you see in buildings, nature and every day objects. Check out various examples on my Pinterest board here, and in the images above & below for inspiration.


Photograph the letters ready to print and stick onto a larger piece of paper spelling the word of your choice (could be a thank you card for your teachers for example), or ready to frame. If you’re framing the letters, check the proportions of the frame and be sure not to cut off any part of the letter when printing. On most phones, you can set the ‘aspect ratio’ of the photo so it will match that of the frame aperture. Print on a home printer, or reputable online printer.
If you prefer not to print and frame / stick on a sheet of paper, you can create a free account on canva.com and make your own digital collage for sharing on social media. (Not as much fun as getting hands on for the kids though!)
Great for developing: an eye for details, spelling, focus.
3. Create a “close up” photo quiz (suitable for ages 5+)
What you’ll need:
Just a camera or camera phone. Nice to have: macro lens attachment for your phone* for close up photos, or a macro lens for your camera - see below. *Check compatibility with your phone.
What to do:
Set your child off on an exploring mission around the home taking close up (zoomed in or using the macro lens) photos of common objects. 20 objects should be enough. You can use this as an opportunity to teach older kids how to focus the camera on the subject and to use portrait mode. Then you can play various games with these photos:
- you /another child has to guess the object
- you go on a hunt to find the objects around the house - using ‘hot’ and ‘cold’ clue from your child to guide you
- print out all the photos on one page and turn it into a spelling game - can your child spell each object correctly on the back
- if your child is too young to take the photos, you could take less obscure, close up photos and see if your toddler can name the items
Great for developing: independence, eye for detail, memory, taking turns, using the camera.
4. Photo scavenger hunt (suitable from 2+)
What you’ll need:
Just a camera or camera phone.
What to do:
Create daily scavenger hunt projects for your child to photograph 20 items that: are for example, a certain colour; begin with a certain letter; made of a certain material (e.g. wood / metal / plastic); items that have certain properties (e.g. liquids, malleable solids, denser than water etc); items from nature (e.g. insects / different plants)… Pick according to age and school learning topics. If they’re very young, they can do the spotting and you can help them with the photo-taking!
5. Your child in a chalk drawing (suitable from 2+)
What you’ll need:
Coloured chalks, a floor to draw on and a camera and probably a stool or chair to stand on.

What to do:
Take your art project outdoors onto a drive, patio or a bit of pavement you’re happy to have your child lie on.
Come up with a creative idea your child can be part of (see this blog post, my Pinterest Board or do a google search for inspiration - there are so many ideas out there!) and get drawing with the chalk. For older kids, get them involved. Then lie your child down in the right place and capture a photo.
Want to get technical?
1. The direction the light comes from, should ideally be from the top of head or left or right. Another way to look at this: the top of your child’s head should be pointing South (if you’re in the northern hemisphere). It’s not so critical on a cloudy day, but on a sunny day this will definitely be more helpful.
2. Try to take the photo from an angle that means you can’t see up your child’s nostrils. For me, this usually means standing on a stool at the same end as the head leaving over. (This is because I am short). if you are taller you will find this easier.
3. The wider the angle you use (less zoomed in) the easier it is to get this photo (but the more distortion you will also see). Just crop the edges in afterwards to neaten everything off.
MORE IDEAS AND RESOURCES
If you’re looking for more ideas, these two blogs are crammed with more brilliant ideas for all ages:
https://kidsactivitiesblog.com/61699/11-photography-projects-kids-can/
https://kidscameraguide.com/photography-projects-for-kids/
And thank you to everyone who has messaged me with ideas, or let me share their posts, here’s a few more tried and tested ones from YOU:
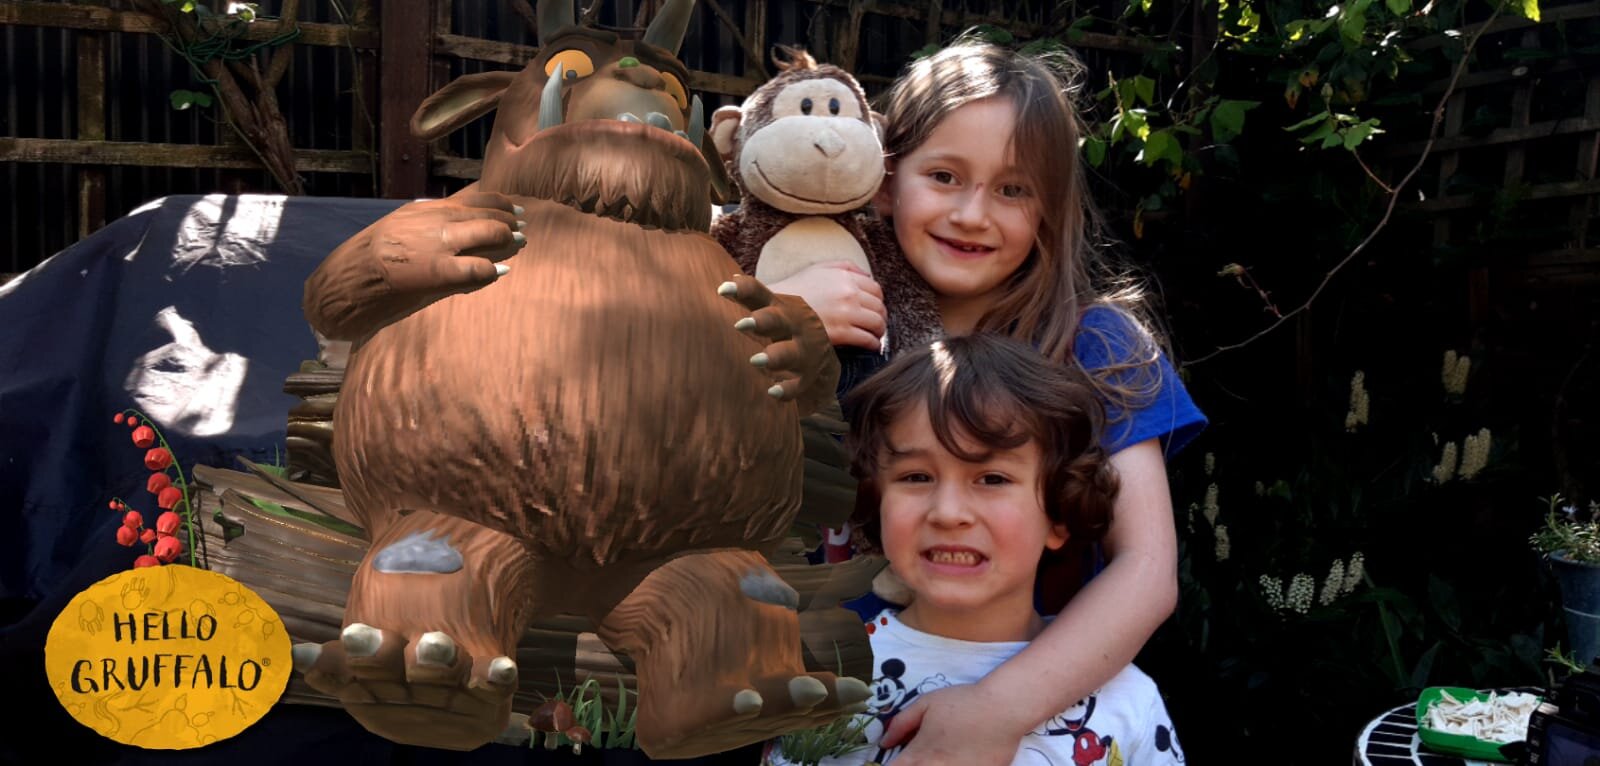
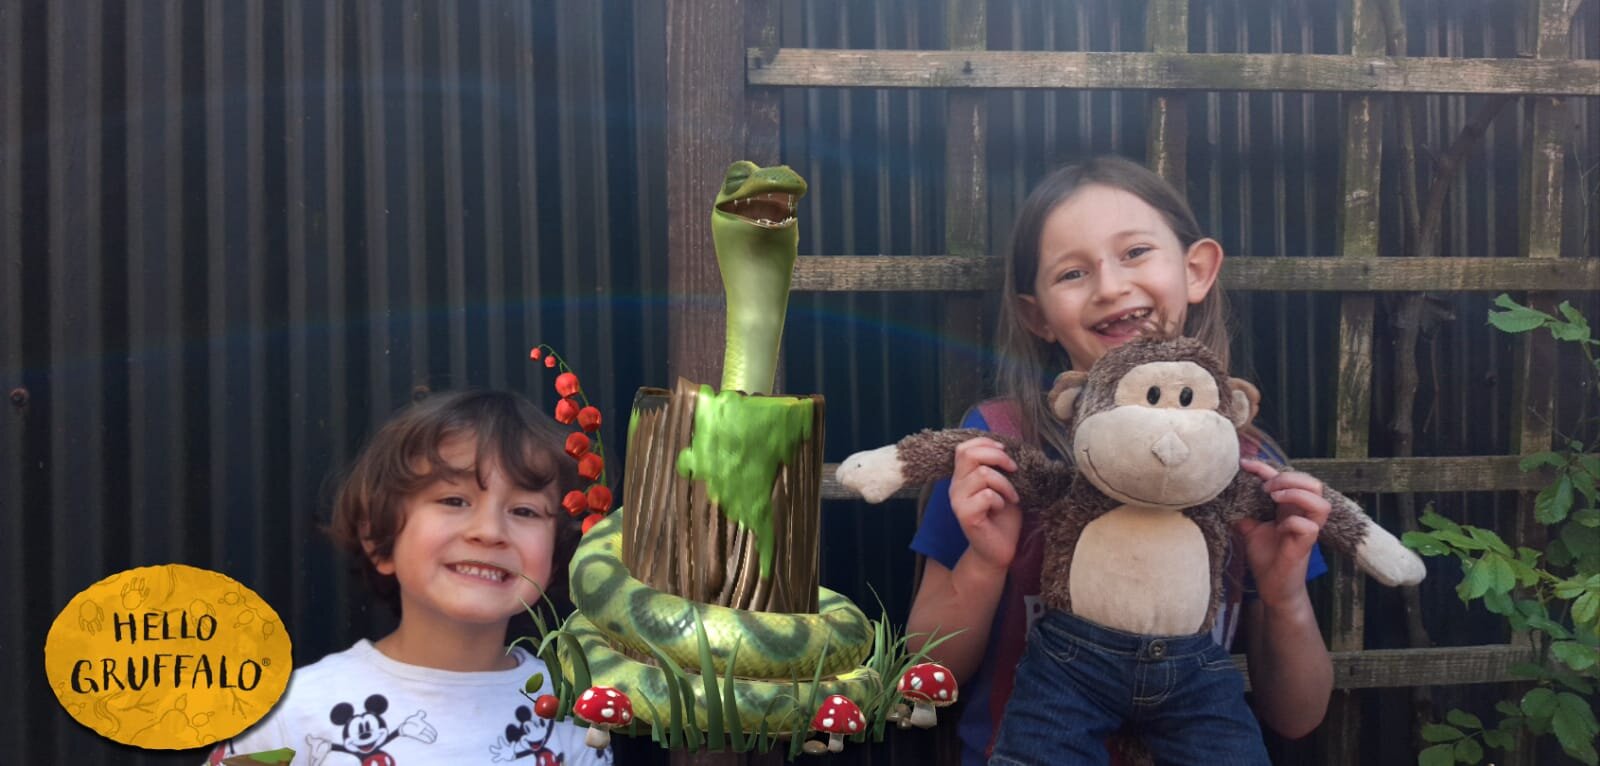
Looking for a fun app for taking photos of the kids?
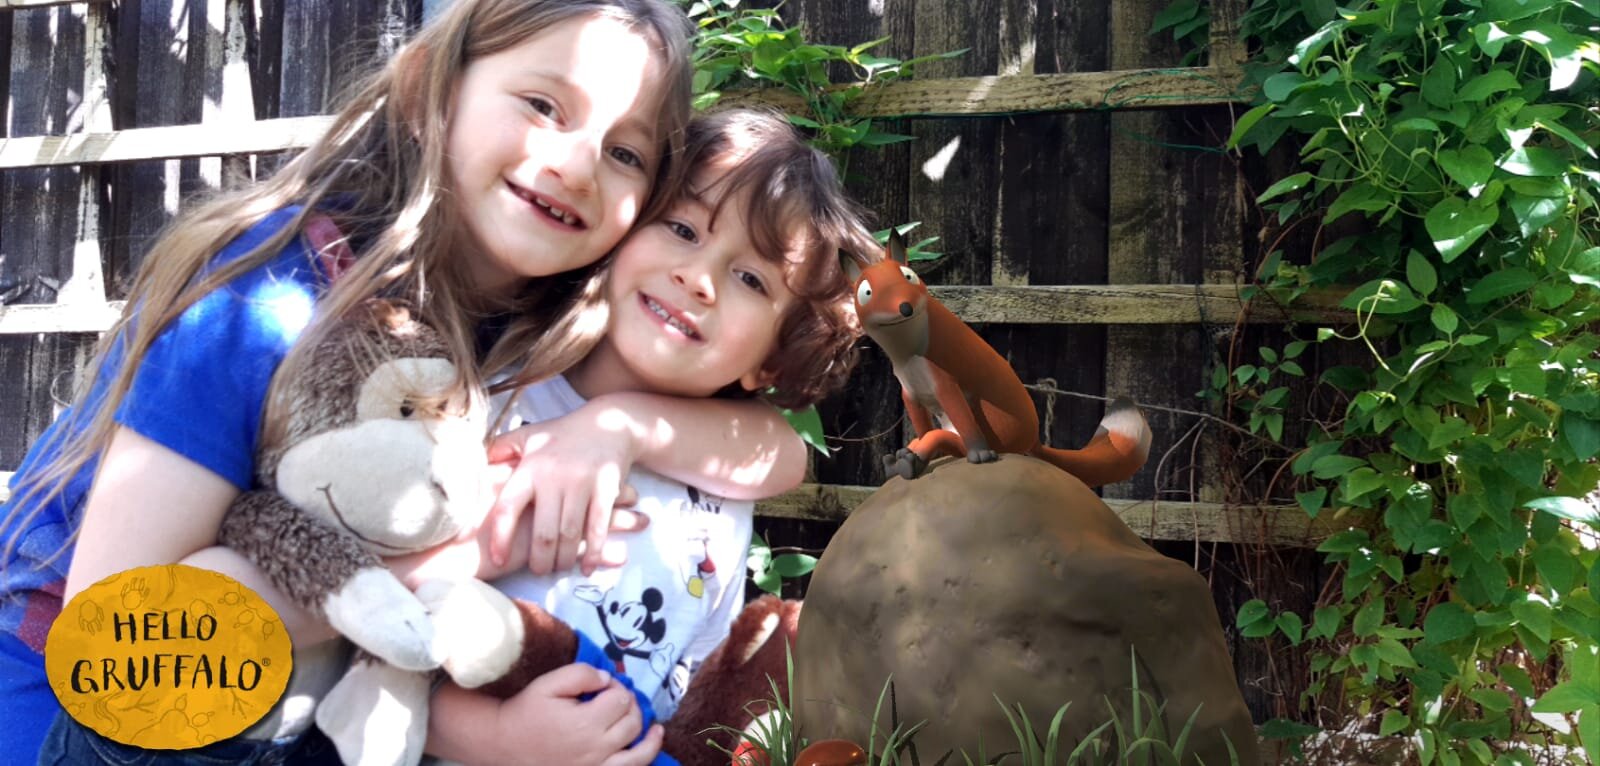
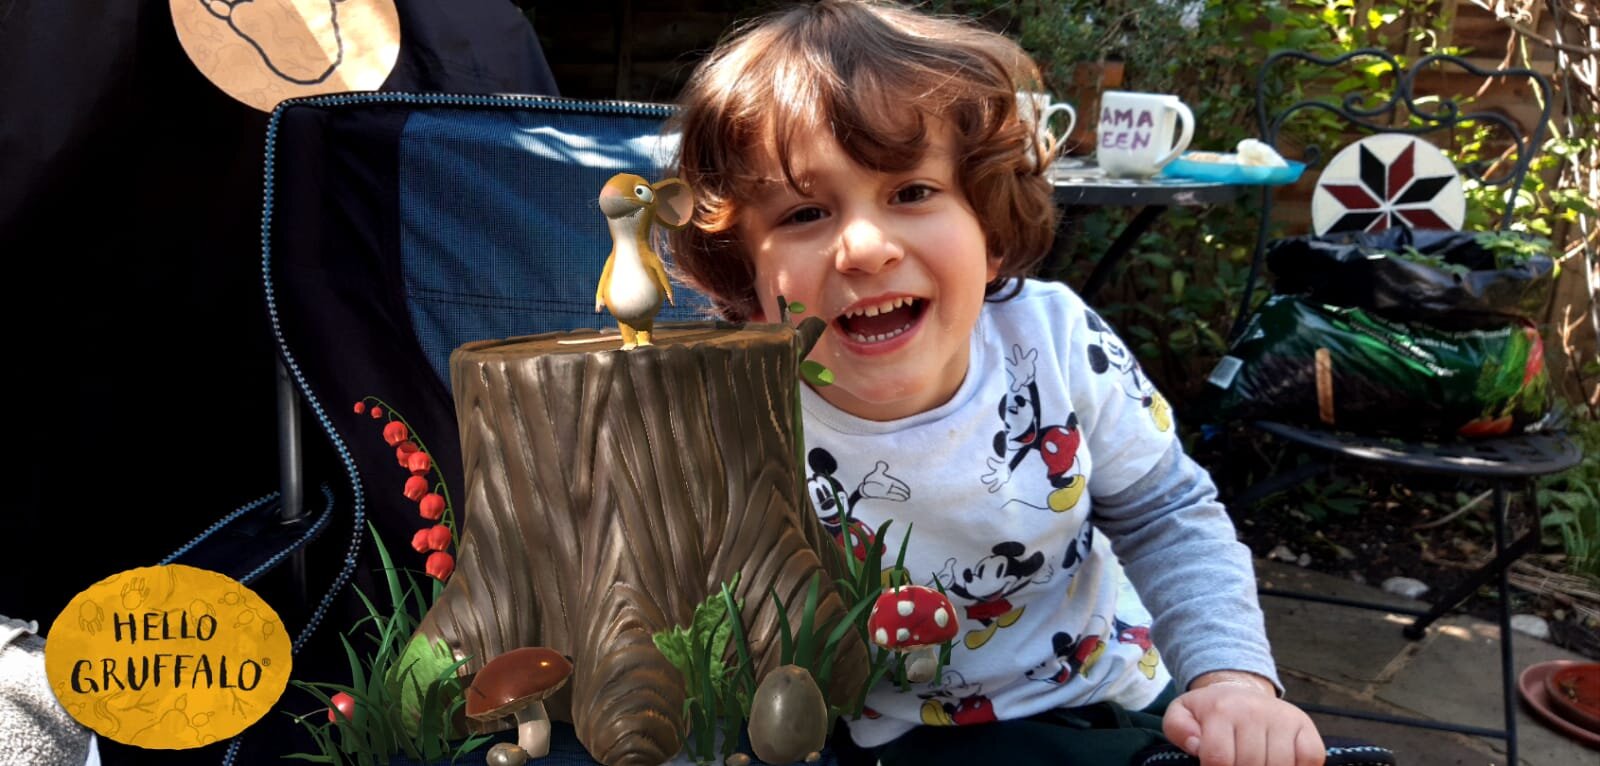
Thank you to long time client Stephanie for telling me about the Hello Gruffalo app, and sharing these photos of her kids with various Gruffalo characters. A bit of fun to look back on with the kids, and to use for story telling together. You can find more details of how to use the app in this facebook post. Download the Hello Gruffalo app for free.
2. Add your rainbow to your photos.Mum of two Gemma (check out her Insta here) loves the PicsArt app. She took a rainbow her daughter had drawn at the beginning of the lock down, and says “I took a photo of it and used the app to add it to the main image. I recommend you try it. It's a great little app that I've used lots over the years.”
Got more of your own suggestions to add? Please just comment below. Enjoy!
Sara x

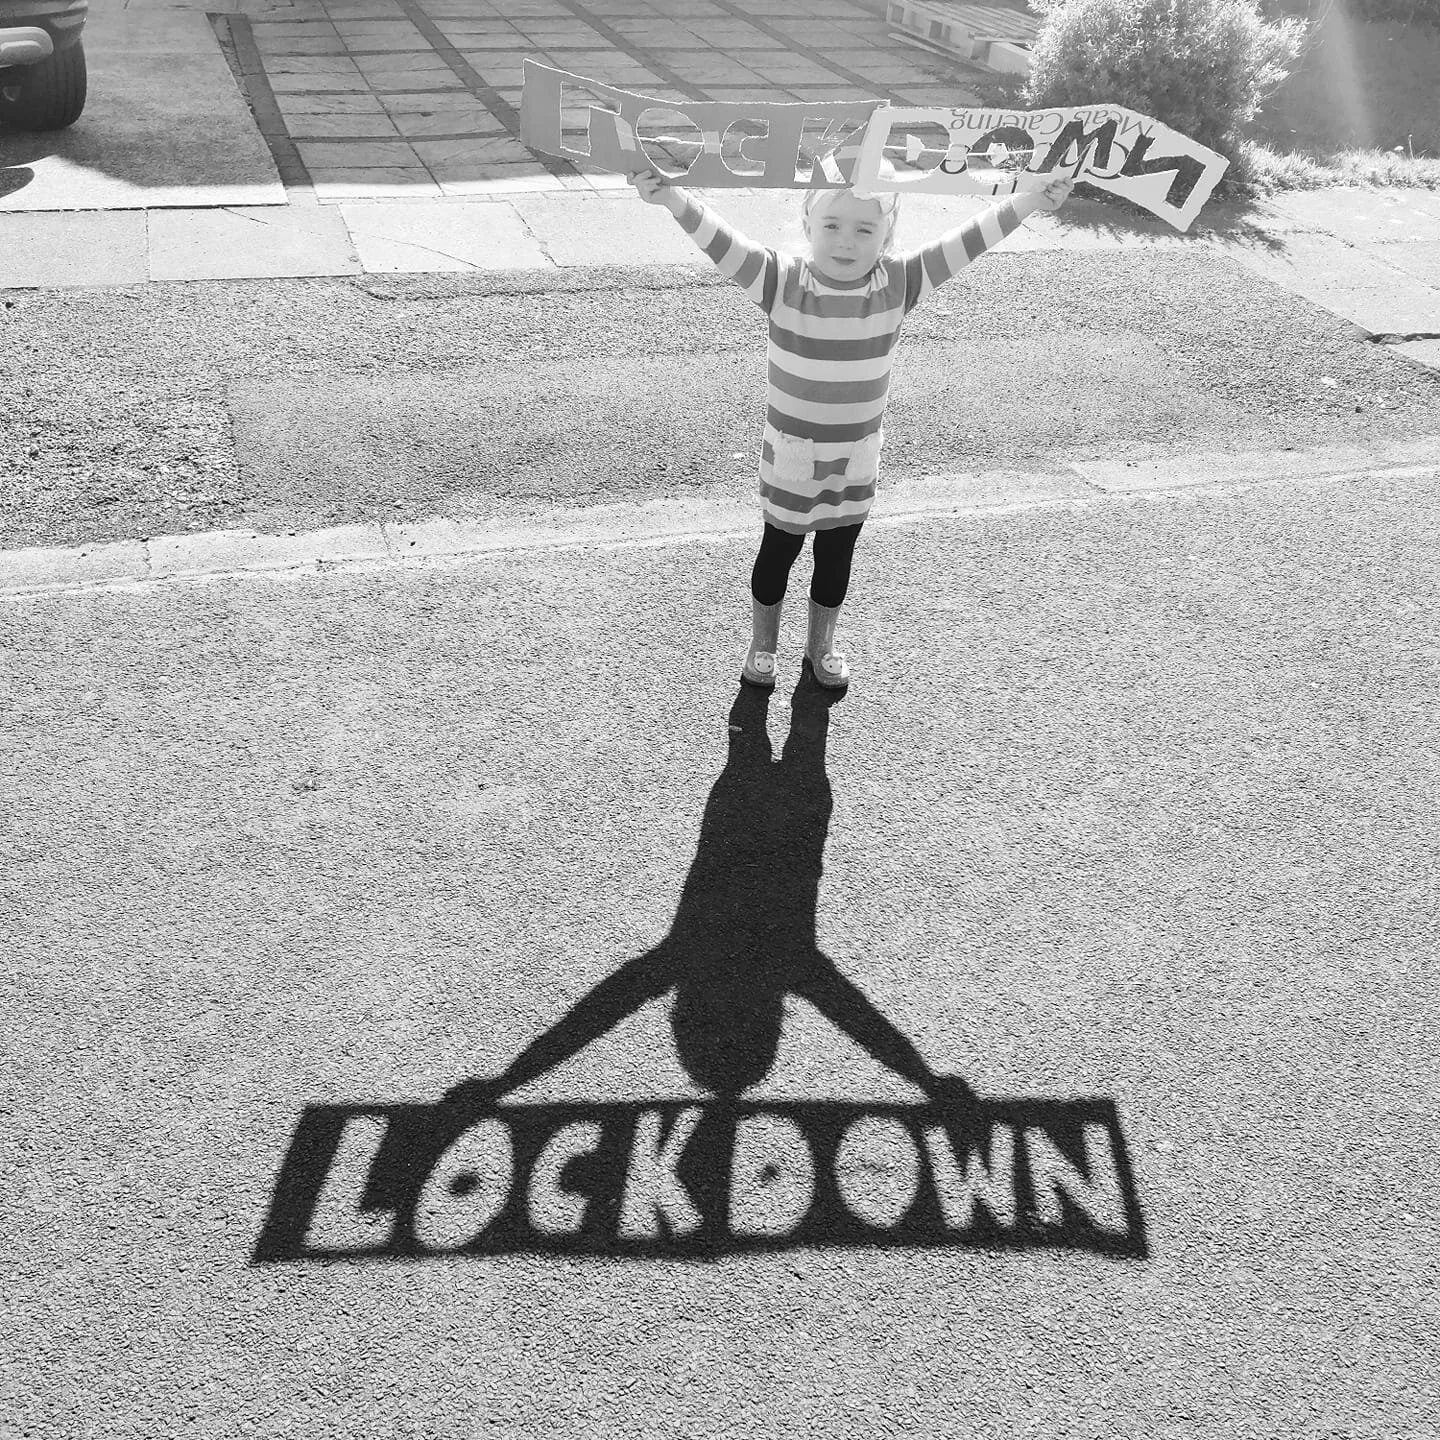
3. Mum Stacey has come up with a brilliant way to use sunlight, and shadows it can cast to create photos with words and messages. Could even use this to create e-cards and birthday cards. Just cut out your letters from a piece of cardboard. Put the sun behind the kids, so the shadow falls forwards towards you. For a crisp shadow, do this on a bright sunny day.